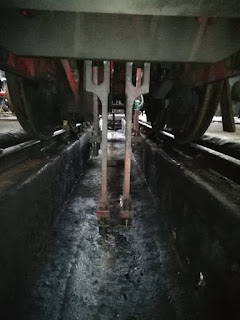
The Task in hand!

Work on the overhaul of Austerity No9 started in June 2019. The blog was started in June 2021 so photos and text will be added as the work progressed through that period. Because of the Covid pandemic work was interupted during that time but the intention is to restore Austerity No9 to working condition as an N.C.B locomotive in blue. Work continues.............

21 August 2021

Removing the motion.

In June and July we removed all the parts of the motion including 8 oil pots still in their NCB blue! All parts are in storage ready to be cleaned, repaired or replaced - probably a winter job.


Oil pots from motion, still in NCB blue. Injector still has some NCB blue as well!


Valve rods disconnected and slide bars where oil pots are located.

LH piston about to be removed.


LH piston removed. Very dry and with some rust on rings.


Before removing the LH piston we slackened the 4" nut on the RH piston. This was achieved by welding a tube to the box spanner.


Eccentric rods.


4 eccentric rods to be removed.


Eccentric rods disconnected.


Eccentric straps for removal.


4 eccentric straps and 1 rod on trolly! Hard work!


The 2 valve connecting rods (centre) and the RH & LH con rods with crossheads on either side.


Both con rods in pit!


 RH & LH big ends and slide bars.


All removed.


Piston valve rods gone along with all other motion.


3 August 2021

Cab and saddle tank.

 The cab is in good condition, apart from the hatch, where water ingress has caused rust around the sliding opening. This was completely cut out and is being replaced. A new section has been made and will be welded in place. The windows have been removed and cleaned but the glass will need replaced. The saddle tank is still at the inspection stage but will require some work and a good clean out. The cladding was reuntied with the saddle tank awaiting work.


  Saddle tank & cab roof in yard.


Cab roof and saddle tank in yard.

Hatch on cab roof cut out. A new section has been made.


 Marking out the template for the new cab roof. Cut out the opening with the plasma cutter.


New cab roof hatch runners both riveted. Stop runner next.

Riveting set-up showing inner cab roof.

Cab roof with hatch in place. Handle still to be fitted.

Cab roof hatch in place. It slides!

Cladding in yard.

Cladding on trolley taken from area where track to new running Shed is being laid. Re-united with the saddle tank! 

Cleaning cab roof with flap discs to remove old paint and surface rust.

Cleaning up quiet nicely.


The new sliding roof will be inserted here.


A coat of red oxide to start the preservation.